

How Long Your Kitchen Is Really Out Of Commission During Cabinet Refinishing
Most homeowners in Plano ask the same question before they commit to a cabinet refinishing project, and it has nothing to do with color or sheen. They want to know how many days they will be living without a functional kitchen, because that answer determines meal plans, work schedules, and how patient the family will be halfway through the job. The honest answer is that a professionally refinished set of kitchen cabinets takes roughly four to seven working days from the first day of masking to the final reinstallation of doors and hardware, though the kitchen itself is only fully unusable for a much shorter window inside that timeline. Cabinet refinishing is a process built around cure times, not around how fast a crew can move a brush, so the calendar is driven by chemistry and temperature as much as by labor. A crew that rushes the drying stages produces cabinets that print fingerprints, block against each other at the door edges, and chip at the hinge points within a year. Understanding where the real downtime falls inside the schedule helps you plan around it instead of guessing. This guide breaks down each phase of the cabinet refinishing timeline, explains what you can and cannot use during each stage, and shows you how to keep your household running while the work happens.
What the Cabinet Refinishing Timeline Actually Looks Like Day by Day
Cabinet refinishing follows a predictable sequence, and every stage has a purpose that cannot be skipped without hurting the finish. The work begins with disassembly and containment, moves through cleaning and sanding, continues into priming and coating, and ends with cure time and reassembly. Doors and drawer fronts almost always leave the kitchen and get sprayed in a controlled area, which is why the boxes and the room itself stay accessible longer than most people expect. Weather plays a role in Plano during humid stretches, since higher humidity slows solvent release and extends recoat windows. A well-run project accounts for that in advance rather than discovering it on day three. Knowing the day by day flow makes the whole process feel far less disruptive than it sounds on paper.
Day One and Two of Cabinet Refinishing: Prep, Degreasing, and Sanding
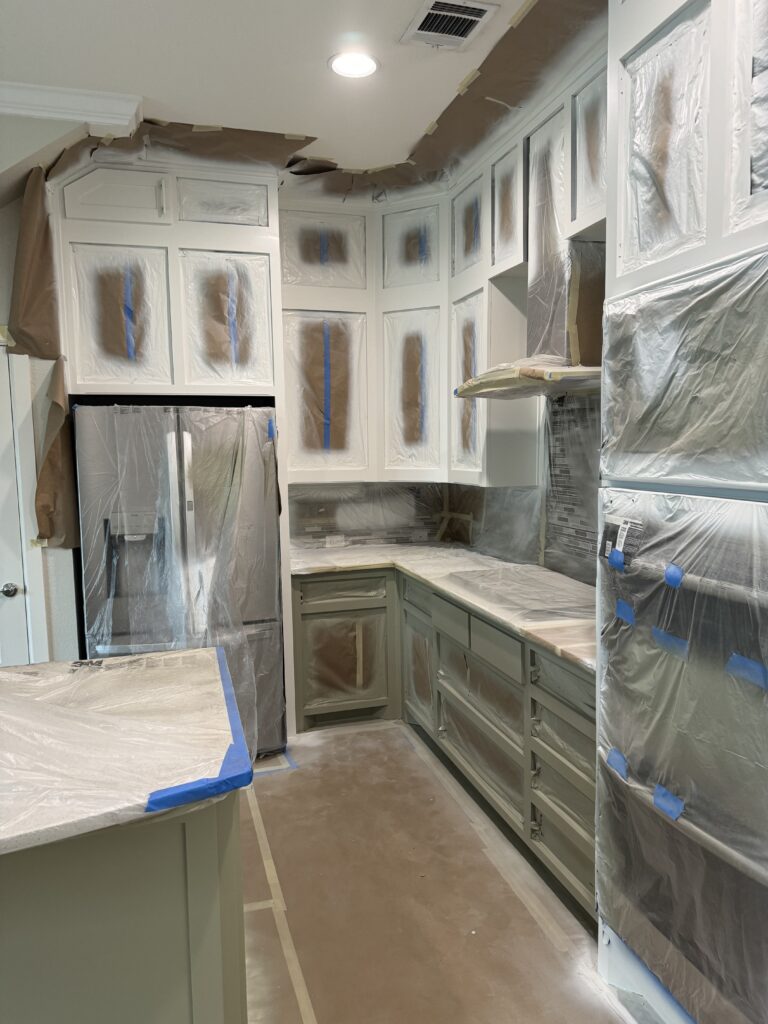
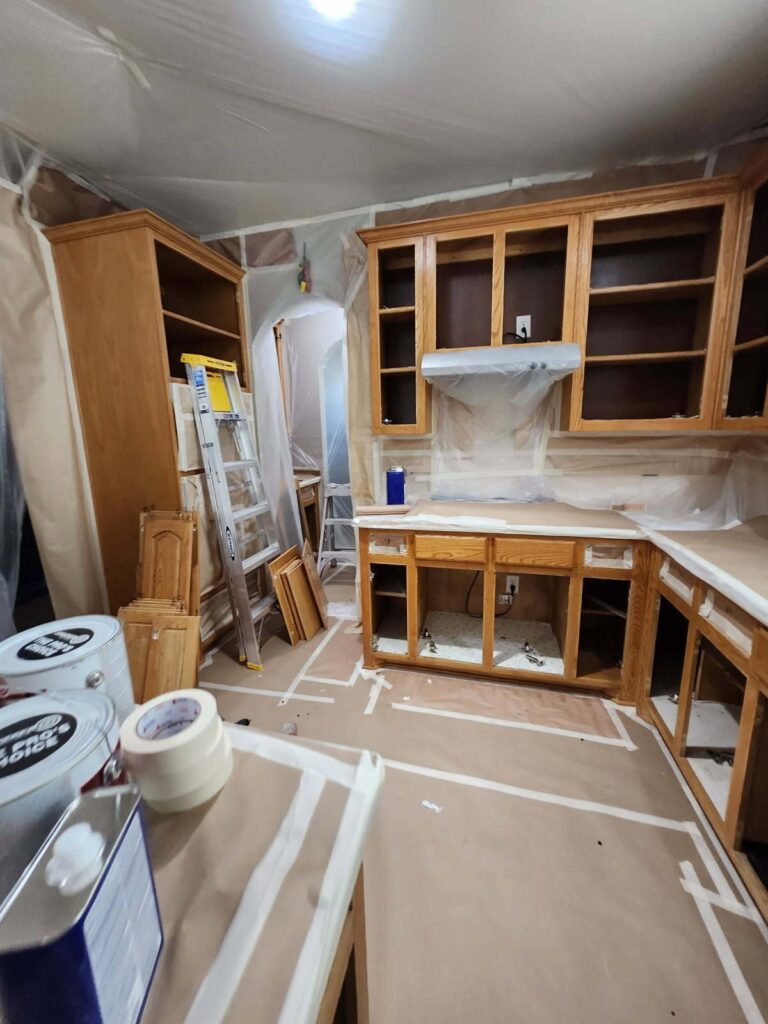
The first two days of a cabinet refinishing project are almost entirely preparation, and this is where the durability of the finish is determined. Crews start by labeling and removing every door, drawer front, hinge, pull, and knob, keeping the hardware organized so reassembly is exact and nothing gets mismatched. Plastic sheeting and masking go up across countertops, backsplashes, appliances, and flooring, and a zipper wall usually separates the kitchen from the rest of the house to control dust migration. The room stays walkable during this stage, but the countertops and sink area disappear under protection, which is the first real hit to your daily routine. Anything stored inside the cabinets should already be boxed and moved before the crew arrives, since open boxes collect sanding dust quickly.
Degreasing comes next, and it matters more on kitchen cabinets than on any other painted surface in a home. Years of cooking vapor leave a film of aerosolized oil on the doors nearest the range, and paint will not bond through that film no matter how good the product is. Crews use a dedicated degreaser or a trisodium phosphate substitute, work in sections, then rinse and let the surfaces dry completely before touching them with abrasive. Skipping this step is the single most common cause of peeling cabinet paint on jobs done cheaply or in a hurry. Homeowners rarely see the difference on day one, but they see it clearly two years later when the doors around the cooktop start shedding.
Sanding follows the cleaning, and the goal is mechanical adhesion rather than stripping the cabinets down to raw wood. A scuff sand with a fine grit knocks the gloss off the existing finish and creates a profile the primer can grip, which is enough for most factory finished or previously painted cabinets. Damaged areas, water swelling near the sink, and chipped edges get spot repaired with filler and sanded flush during this same window. Dust extraction on the sanders keeps the mess controlled, though some fine dust always escapes, which is why the containment matters. By the end of day two the kitchen looks stripped and chalky, the sink is usually still usable, and the actual coating work has not started yet.
Day Three and Four of Cabinet Refinishing: Priming and the First Coats
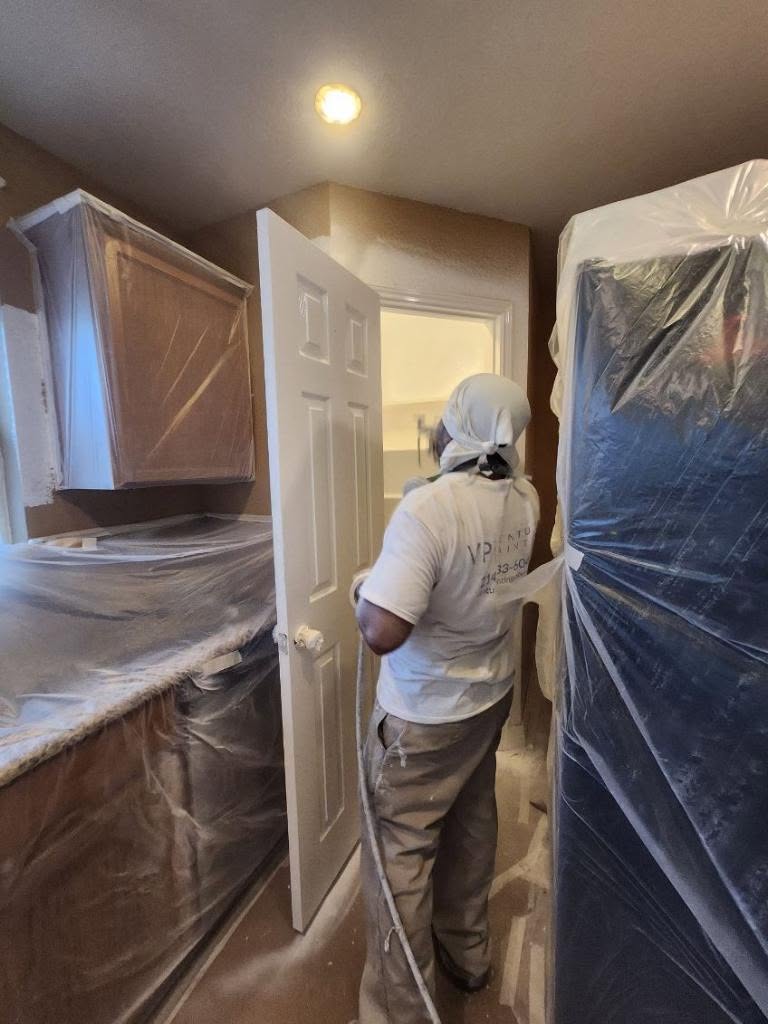
Priming is the stage where the cabinet refinishing project starts to look like progress, and it is also the point where the kitchen becomes genuinely restricted. Doors and drawer fronts are sprayed in a separate staging area, often a garage or a shop, using a bonding primer chosen for the substrate underneath. Oak, maple, birch, thermofoil, and previously painted surfaces all behave differently, and the primer selection accounts for grain, tannin bleed, and adhesion needs. The cabinet boxes and face frames stay in the kitchen and get sprayed or brushed in place, which means the room is off limits while spray equipment is running and while the coating flashes off. Ventilation runs during this period, and most crews ask that pets and children stay clear of the area entirely.
Once the primer cures, the surfaces get a light sand to knock down any raised grain or dust nibs, then the first finish coat goes on. Quality cabinet work uses a waterborne alkyd, a urethane modified acrylic, or a two component conversion product, all of which level out far better than standard wall paint and cure much harder. Wall paint on cabinets stays soft indefinitely and will stick to itself when doors close against frames, which is a failure homeowners discover the first time they shut a cabinet in July. The choice of product also drives the timeline, since some finishes recoat in a few hours and others require a full overnight rest. This is the stretch where patience pays off the most.
During these two days the kitchen is functionally out of commission for cooking and prep, though you can usually still reach the refrigerator if the crew plans access in advance. The sink is often masked off while boxes are being coated, so dishwashing needs a temporary home elsewhere in the house. Most families handle this window with a coffee station, a microwave, and a cooler set up in a dining room or garage. Telling your crew ahead of time which appliances you need daily access to lets them stage the work so those items stay reachable. Communication here removes almost all of the frustration people associate with kitchen projects.
Day Five Through Seven of Cabinet Refinishing: Final Coats, Cure Time, and Reassembly
The final coats go on early in this stretch, and then the project shifts from active labor into waiting. Coating a cabinet door is fast; letting it harden enough to handle without leaving marks is the slow part, and that distinction confuses a lot of homeowners. Dry to touch and cured are two very different milestones, and the manufacturer data sheet for the product is the only reliable guide. Most quality cabinet coatings are dry to touch within an hour, ready for reassembly in one to three days, and fully cured somewhere between seven and thirty days. The crew will not hang doors early just to look finished, because stacking or handling soft finish leaves permanent impressions.
Reassembly happens once the doors and drawer fronts have hardened enough to handle safely, which usually lands on day five, six, or seven depending on product and humidity. Hinges go back on, doors get hung and adjusted for even reveals, drawer fronts get aligned, and pulls and knobs are reinstalled to the original or new hole pattern. Soft close hardware gets tested, alignment gets tuned, and any touchups from handling get addressed on the spot. The masking comes down, the containment wall comes out, and the crew cleans the space so the kitchen is immediately usable again. At this point your kitchen is back in service for normal cooking and daily use.
Full cure continues quietly in the background for several weeks after the crew leaves, and how you treat the cabinets during that period affects the long term result. Avoid harsh cleaners, do not scrub the surfaces, and try not to stack heavy items directly against door faces for the first couple of weeks. Felt bumpers on door and drawer edges are a smart addition, since they prevent the finish from contacting itself while it continues to harden. Wipe spills with a soft damp cloth rather than a scouring pad, and hold off on shelf liner adhesives until the interiors have had time to set. Following these habits for a few weeks protects a finish that should last a decade or more.
What Makes a Cabinet Refinishing Timeline Longer or Shorter in a Plano Kitchen
No two kitchens run on the same schedule, and the variables that stretch or compress a cabinet refinishing timeline are mostly predictable before the job starts. Door count is the biggest single factor, since every door and drawer front has to be cleaned, sanded, primed, coated on both faces, and cured individually. Kitchen size, cabinet condition, the existing finish, the coating system chosen, and the weather all push the calendar in one direction or another. A small galley kitchen with twenty doors moves much faster than a large open concept kitchen with an island, a pantry wall, and forty five pieces. Understanding these factors in advance lets you set realistic expectations and plan your household around a firm window. It also helps you evaluate a quote that promises a two day turnaround, because that promise usually means corners are being cut somewhere.
How Cabinet Count and Kitchen Layout Affect Cabinet Refinishing Timelines
The number of doors and drawer fronts drives labor hours more than square footage does, and it is the first thing an estimator counts during a walkthrough. A typical Plano kitchen falls somewhere between twenty five and forty five pieces once you include upper doors, lower doors, drawer fronts, and any glass front or pantry units. Each of those pieces gets handled at least six separate times across the project, so the count multiplies quickly into real hours. Larger kitchens with islands, built in desks, and butler pantries add pieces that people forget to include when they picture the job. Sharing an accurate count early keeps the estimate and the schedule honest.
Layout matters too, particularly when the kitchen opens directly into a living space without a door to close. Open concept homes need more containment, more masking, and more attention to dust and overspray control, which adds setup time on the front end. Kitchens with tall ceilings, crown molding, or stacked upper cabinets require staging and extra care around the trim above. Islands with paneled ends and decorative feet take longer than a plain box because they have more surfaces and edges to coat. None of this changes the total by days, but it does add hours that accumulate across the week.
The condition of the existing cabinets adds or removes time as well. Cabinets with heavy grease buildup need extra degreasing passes; cabinets with water damage near the dishwasher or sink need repair and additional dry time before coating. Doors with failed thermofoil or delaminating veneer may need replacement rather than refinishing, and that decision has to be made early since replacement doors have their own lead times. Solid wood doors with deep grain sometimes get a grain filling step if you want a smooth painted look, which adds a full day. An honest assessment during the estimate prevents surprises once the work is underway. Thinking about updating your kitchen? Click here for our cabinet refinishing service and see what the process looks like on your cabinets.
How Coating Choice and Texas Humidity Affect Cabinet Refinishing Timelines
The coating system selected for your cabinets sets the pace for the entire project, because recoat windows and handling times vary widely between products. Waterborne alkyd enamels offer excellent leveling and a hard cure, and they typically allow recoating within four to six hours under good conditions. Two component conversion varnishes and catalyzed products cure harder and faster in some cases, but they require careful mixing, a controlled spray environment, and proper ventilation. Standard latex wall paint has no place on cabinets at all, since it stays soft, blocks against itself, and marks under fingernail pressure indefinitely. Choosing the right product is not about brand loyalty; it is about matching the chemistry to a surface that gets touched hundreds of times a week.
Humidity in North Texas influences dry times more than most homeowners expect, especially during humid spring stretches and after storms roll through. Waterborne coatings release moisture into the air as they dry, and when the surrounding air is already saturated that release slows considerably. A door that would be ready to recoat in four hours on a dry day may need eight or more when the humidity climbs. Temperature swings matter too, since coating in a garage that drops below the product minimum overnight can leave the finish soft or cloudy. Experienced crews monitor conditions and adjust the schedule rather than pushing through and hoping.
Spray application versus brush and roll application changes both the timeline and the result. Spraying produces the smooth factory look most homeowners want from a refinishing project, and it applies material evenly across profiles, panels, and edges. It also requires more setup, more masking, and a dedicated staging area, which front loads the labor into the first days of the project. Brushing and rolling can work on cabinet boxes and face frames when done skillfully with the right additives, but the doors deserve spray application if you want the finish to look professionally done. The extra prep time buys a finish that reads as new cabinetry rather than painted cabinetry.
Why Your Kitchen Deserves a Properly Scheduled Cabinet Refinishing Project
A cabinet refinishing project done on a real timeline transforms a kitchen for a fraction of what replacement costs, and it keeps your existing boxes out of a landfill. The difference between a finish that lasts a decade and one that fails in a year comes down almost entirely to preparation and cure time, both of which live inside the schedule. Rushing the job to shave two days off the calendar is the most expensive shortcut a homeowner can take, because a failed cabinet finish has to be stripped and redone from the beginning. A crew that explains the timeline honestly, protects your home carefully, and respects the product data sheets is worth waiting for. Your kitchen is the most used room in the house, and the cabinets are the surface your family touches more than any other.
Planning Your Household Around a Cabinet Refinishing Timeline
Setting up a temporary kitchen before the crew arrives makes the entire week far easier on everyone in the house. Move the coffee maker, microwave, toaster, and a few essentials to a dining room table or a garage counter and treat that as home base until the work wraps. Plan simple meals, lean on the grill if the weather cooperates, and accept that a few takeout nights are part of the budget for this kind of project. Families who prepare in advance report almost no stress during the process, while families who wing it feel the disruption every single day.
Empty the cabinets completely before day one, including the upper corners and the pantry if it is part of the scope. Sanding dust travels, and even good containment will not keep every particle out of open shelving, so boxing items up protects them and speeds the crew’s setup. Label the boxes by cabinet so putting everything back is quick rather than an all day sorting project. This one step saves more time on the back end than almost anything else you can do.
Talk to your crew about access needs before work begins, particularly around the refrigerator, the sink, and any medical or dietary supplies stored in the kitchen. Good crews will stage the work so critical items stay reachable, but they need to know which ones matter to you. Pets should be secured away from the work area for their safety and to keep them out of wet finish. A short conversation on the first morning prevents most of the friction that people associate with kitchen renovations.
What a Realistic Cabinet Refinishing Estimate Should Include
A trustworthy cabinet refinishing estimate lists the door and drawer count, the coating system by name, the prep steps included, and the expected working days from start to finish. Vague quotes that give a price and a color without describing the process leave far too much room for shortcuts you will not see until the finish fails. Ask specifically about degreasing, sanding, primer selection, and how many finish coats are included on each surface. Ask where the doors will be sprayed and how the kitchen will be contained during the work.
The estimate should also address hardware, since new pulls with different hole spacing require filling and drilling that adds labor. Interior cabinet surfaces, shelf edges, and the inside faces of doors are sometimes included and sometimes not, and that distinction should be written down rather than assumed. Repairs to damaged doors, replacement of failed thermofoil panels, and any grain filling should appear as line items with their own time impact. Clarity on paper prevents disagreements once the project is underway.
Finally, a good estimate explains the cure schedule and what you should expect after the crew leaves. Knowing that the finish continues hardening for several weeks changes how you treat the cabinets during that period, which protects your investment. A company that walks you through aftercare is a company that expects the work to still look good years from now. That kind of transparency is a reliable signal of how the rest of the job will go. Planning a larger refresh at the same time? Click here for our interior painting service and combine the projects into one schedule.
Why Choose Venture Painting for Your Cabinet Refinishing Project
Venture Painting builds every cabinet refinishing schedule around the preparation and cure times the coatings actually require, not around a calendar we are trying to clear. Our crews degrease thoroughly, sand for adhesion, prime with the right product for your substrate, and spray finish coats that level out into a smooth, durable surface. We contain the work area, protect your counters and floors, and keep the space organized so your home stays livable through the week. Detailed prep work is the reason our finishes hold up, and we do not shorten it for anyone.
We serve Plano and the surrounding communities including Dallas, Richardson, Allen, Murphy, Parker, Sachse, and Addison, and we treat every kitchen like it belongs to a neighbor. Our estimates are free and our pricing is clear, with the scope written out so you know exactly what is included before we start. Clean, organized, respectful crews show up on time and communicate throughout the project. You will always know what stage the work is in and when your kitchen comes back online.
If you are ready to bring your kitchen cabinets back to life without the cost and mess of full replacement, we would be glad to walk your space and give you a straight answer on scope and schedule. Click here to see our service areas and confirm we cover your neighborhood. Call Venture Painting at (214) 233-6044 or email zeb@venturepaintingdfw.com to schedule your free cabinet refinishing estimate, and we will give you a realistic timeline for your kitchen before you commit to anything.