

The Fence Staining Mistake That Only Shows Up After The First Hard Freeze
Fall fence staining looks simple from the outside. A crew shows up, the wood gets a fresh coat, the fence looks rich and even, and everyone walks away happy. Then the first hard freeze moves through North Texas, usually somewhere between late November and mid January, and the finish starts lifting in patches along the pickets and rails. The mistake almost never happens during the freeze itself; it happened weeks earlier, on the day the stain went on. Wood that was still holding moisture got sealed under a coating, and that trapped water had nowhere to go once the temperature dropped below thirty two degrees. This article walks through exactly how that failure develops, how to spot it early enough to save the fence, and what correct fall timing looks like for a wood fence in Plano and the surrounding suburbs.
What Is the Fence Staining Mistake That Fails After the First Hard Freeze
The single most common fence staining mistake is applying stain to wood that has not dried down to a workable moisture content. Pressure treated pine leaves the lumberyard soaked with preservative solution, and a fence built in September can still read well above twenty percent internal moisture in October. Cedar dries faster but holds water in the heartwood after a heavy rain, and a fence that feels dry to the hand can be saturated a quarter inch below the surface. Stain applied over that moisture does not bond to wood fiber; it bridges over a wet layer and sits there like a lid. Freezing temperatures then turn that trapped water into ice, and ice occupies roughly nine percent more volume than the water it came from. That expansion pushes outward from inside the board, and the coating is the weakest thing standing in its way.
How Trapped Moisture Creates a Fence Staining Failure After Freezing
Wood is not a solid block; it is a bundle of hollow cellular tubes that move water in and out constantly. When a fence is stained correctly, the finish penetrates the top layer of those cells and leaves the wood able to release vapor slowly through the surface. When a fence is stained over damp wood, especially with a solid or heavily pigmented product, the finish forms a film that dramatically slows vapor release while the interior stays wet. Through October and November that trapped moisture usually does nothing visible, which is why the mistake goes unnoticed for so long. The first hard freeze changes the physics completely, because the water inside those cells crystallizes and expands against the underside of the coating. Each freeze and thaw cycle repeats the process, and North Texas can deliver a dozen or more of those cycles in a single winter. By February the bond has been mechanically broken from behind, and the stain peels off in sheets or flakes even though the product itself never failed.
The damage pattern tells the story clearly once you know what to look for. Failures caused by trapped moisture almost always start on the horizontal rails and the picket tops, because those surfaces collect rain and hold it longer than vertical faces. You will also see concentrated peeling near the bottom six inches of each picket, where soil contact and splashback keep moisture content elevated year round. Boards on the north facing side of the fence tend to fail first, since they get the least sun and dry the slowest after every rain event. The failure edges look sharp and curled rather than worn and faded, which separates a moisture problem from normal weathering. A properly applied penetrating stain wears away gradually and evenly; it does not curl up at the edges and lift.
There is a second version of this mistake that shows up on older fences rather than new ones. A homeowner cleans the fence with a pressure washer on a Saturday, likes how bright the wood looks, and stains it Sunday morning before the wood has dried. Pressure washing drives water deep into the grain, and even a warm sunny day only dries the outer surface. Most manufacturers ask for a minimum of forty eight hours of dry weather after washing, and cooler fall conditions with shorter daylight often push that to three or four days. Skipping that wait produces the exact same trapped moisture problem as staining green lumber, with the exact same freeze driven peeling three months later. If you want the finish to last, the drying time between cleaning and staining is not optional padding in the schedule.
The Fence Staining Temperature Window Most Homeowners Miss
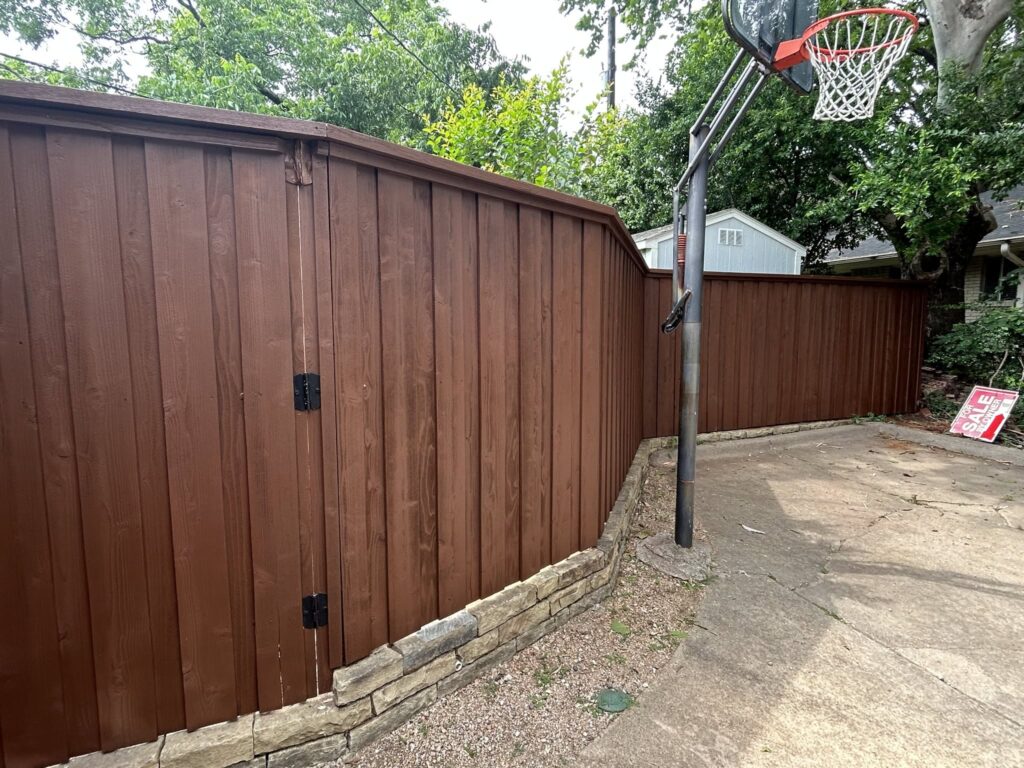
Every stain on the shelf carries a minimum application temperature, and most standard oil and water based products list fifty degrees Fahrenheit as the floor. That number refers to both air temperature and surface temperature, and the two are frequently different by ten degrees or more on a fall afternoon. The bigger issue is that the minimum applies to the entire cure window, not just the moment of application. A water based stain applied at fifty five degrees at two in the afternoon may still be curing at four in the morning when the thermometer reads thirty eight, and that interruption leaves the coating soft, weak, and poorly adhered. Fall in Plano regularly produces thirty degree swings between afternoon high and overnight low, which makes late season timing much trickier than summer timing. A crew that only checks the daytime forecast is going to miss this consistently.
Dew point is the other measurement that gets ignored, and it matters enormously in October and November. As a general rule the wood surface should sit at least five degrees above the dew point during application and through the initial cure. When surface temperature drops to the dew point, moisture condenses directly onto the fence, and condensation forming on a partially cured stain leaves a hazy, blotchy, weakly bonded finish. Cool nights combined with the humidity that rolls up from the Gulf make dew a near daily event across DFW through the fall. This is why afternoon application without adequate cure time before sunset causes so many problems. Morning starts and early finishes give the coating the daylight hours it actually needs.
Curing is also a chemical process that slows down as temperatures fall, and slower does not simply mean longer. Oil based penetrating stains cure through oxidation, and that reaction can stretch from one day at seventy degrees to several days at fifty. Water based products cure through coalescence, which requires the resin particles to fuse together, and that process essentially stalls below the minimum film formation temperature. A finish that never fully coalesced has no real film integrity, so the first freeze finds an easy target. Applying stain in a window that looks acceptable at noon but collapses by nightfall is one of the most preventable failures in the trade. Reading the full seventy two hour forecast before starting is the difference between a fence that lasts four years and one that needs redoing next spring. If your fence is heading into winter unprotected or already showing early problems, click here for our fence staining service and we will assess the wood before the cold sets in.
Fence Staining Prep Steps That Prevent Freeze Damage
Real prep begins with measuring moisture rather than guessing at it. A pin type moisture meter costs very little and tells you in seconds what the surface cannot. The target for most fence stains is fifteen percent or lower, and many manufacturers prefer twelve to fifteen for full penetration. Readings should be taken at several points across the fence, including shaded sections, low pickets near the soil, and the underside of rails. New pressure treated pine often needs anywhere from four weeks to six months of drying depending on when it was milled and how it was stored. The old trick of sprinkling water on the boards still works as a rough field check; beading water means the wood is not ready, and water that soaks in within a minute or two suggests the cells are open and receptive.
Cleaning comes next, and the goal is removing everything that would block adhesion. Mill glaze on new cedar, gray oxidized fiber on weathered wood, mildew, pollen, and old failing finish all prevent stain from reaching live wood. A percarbonate based wood cleaner lifts most of this without the fiber damage that aggressive pressure washing causes. Any cleaner with a high pH should be followed by an oxalic acid brightener, which neutralizes the surface and restores the wood to a pH range that stain can bond with properly. Skipping the brightener step leaves the surface chemically hostile to the coating even though it looks perfectly clean. Light sanding on smooth cedar or previously finished boards opens the grain and improves penetration significantly.
Application technique determines how the finish behaves under stress. Stain should be worked into the wood and back brushed rather than simply sprayed on and left, because spraying alone deposits product on the surface without driving it into the grain. Two thin coats applied wet on wet penetrate far better than one heavy coat, and a heavy coat is more likely to skin over and trap solvent or water underneath. Every end grain cut, post top, and rail joint deserves extra attention, since end grain absorbs water at rates many times higher than face grain. Working in shade or on an overcast day prevents the stain from flashing off before it can soak in. Prep and application done this way produces a fence that sheds water all winter instead of storing it.
How to Spot Fence Staining Damage After the First Hard Freeze in North Texas
The window between the first hard freeze and full spring weather is when fence staining problems become visible and also when they are still cheap to correct. Most homeowners walk past their fence daily without really looking at it, and by the time the damage is obvious from the patio it has usually spread across multiple sections. Early detection matters because a coating that has lifted is no longer protecting the wood underneath, and exposed wood absorbs water, grows mildew, and begins checking. Once checking opens up along the grain, water gets in deeper and the freeze cycles start damaging the board itself rather than just the finish. A fence caught early can often be spot corrected; a fence caught late usually needs full stripping or picket replacement. Ten minutes of close inspection in January can save a significant repair bill in April.
Early Signs of Fence Staining Failure on Pressure Treated Pine
Pressure treated pine is the dominant fence material across Plano, Allen, and Murphy, and it fails in a predictable sequence. The first indicator is usually a dull chalky look on the rails where the coating has begun losing its bond and scattering light differently than the surrounding wood. Run a thumbnail lightly across a suspect area; sound stain resists, while compromised stain powders off or peels back in a thin curl. Next you will see small blisters, often no wider than a dime, clustered where moisture concentrated during the fall. Those blisters are hollow, and pressing one collapses it and reveals bare wood underneath. Pine also cups and twists more than cedar as it dries unevenly, and a coating stretched across a cupping board splits along the high points of the grain.
Watch the fasteners closely, because they signal moisture problems earlier than the wood does. Rust streaks bleeding down from nail or screw heads mean water has been sitting at those penetration points long enough to attack the coating on the fastener. On pressure treated lumber the preservative chemistry is corrosive to standard steel, so moisture accelerates that reaction considerably. Dark rings around fastener heads point to water wicking into the hole and freezing there. Those are also the spots where the coating breaks first, since the metal expands and contracts at a completely different rate than the wood surrounding it. A fence showing rust bleed after one winter almost certainly went into that winter carrying too much moisture.
The bottom of the fence deserves its own inspection pass. Ground contact, sprinkler overspray, and splashback from hard rain keep the lowest boards damp far longer than anything above them. Look for a horizontal line where the finish changes character, usually four to eight inches off the ground, marking the zone that stayed wet through the freeze cycles. Soft or spongy wood at that line means decay has already started and the picket may need replacing rather than refinishing. Check the posts at grade level as well, since post failure is far more expensive to fix than picket failure. Adjusting sprinkler heads away from the fence is a small change that meaningfully extends the life of the next stain job.
Fence Staining Problems on Cedar Fences After Freeze Thaw Cycles
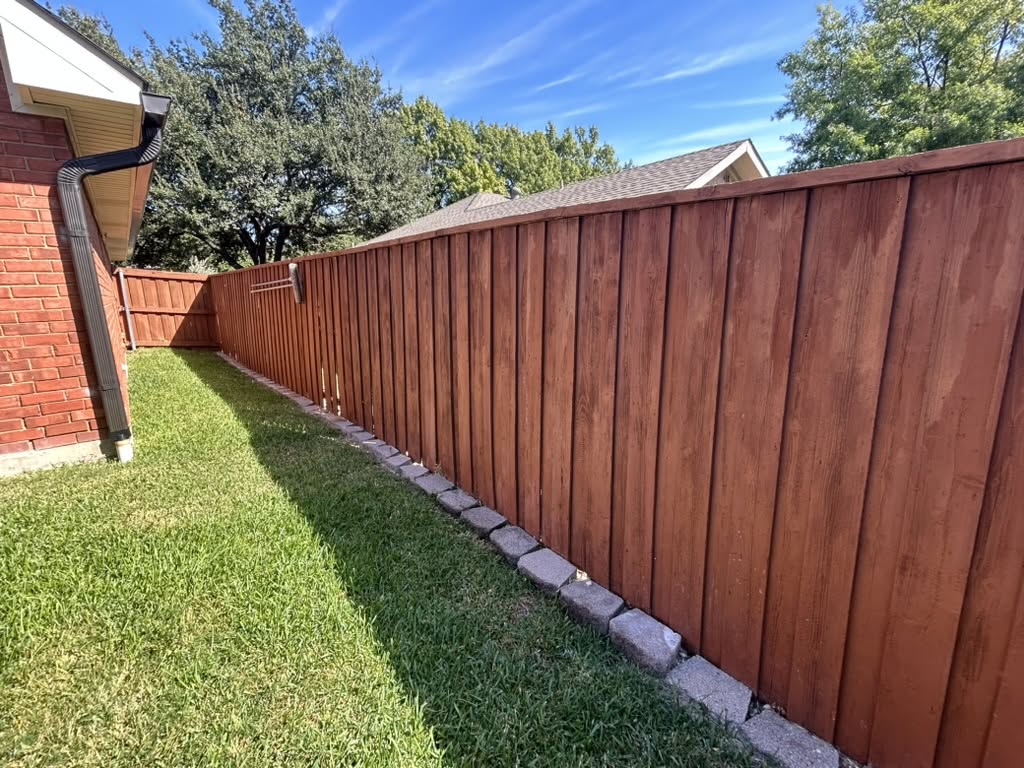
Cedar behaves differently under freeze stress because of its cellular structure and natural oils. Western red cedar is more dimensionally stable than pine, so it cups less, but it is also softer and more prone to surface fiber damage. When a coating fails on cedar, the wood underneath often goes gray quickly and develops a fuzzy texture as the surface fibers break down. Tannin extraction is another cedar specific problem, showing up as dark brown or reddish streaks running down from the coating failure. Those streaks mean water is moving through the wood and carrying natural extractives to the surface, which confirms the finish is no longer sealing. Cedar also shows checking more visibly, with fine cracks opening along the grain as the boards go through repeated wetting and freezing.
Knots are the weak point in almost every cedar fence. They are denser than the surrounding wood, they absorb stain at a different rate, and they expand and contract on their own schedule. Coating failure very often radiates outward from knots in a rough circle, and that pattern is a reliable sign of freeze driven stress rather than simple wear. Loose knots that have started backing out of the board indicate the wood has been moving significantly with moisture change. Small checks in and around knots are normal and acceptable; wide splits that pass fully through the board are not. Each of those openings collects water and repeats the freeze damage cycle every cold night.
The transition between cedar pickets and pressure treated rails or posts is another failure zone worth checking. Different species dry at different rates and move by different amounts, and a coating spanning that joint gets pulled from both sides. Look for hairline cracks in the finish where cedar meets pine, particularly on the horizontal surfaces of the rails. Water entering those cracks travels along the joint and stays there, since the connection point dries far more slowly than open faces. On a fence heading into a second winter, sealing those joints properly during refinishing prevents the same failure from repeating. Homeowners in Richardson and Sachse with mixed material fences see this pattern often, and it is one of the first things we check during an inspection.
What Fence Staining Repairs Cost After Winter Damage
Repair cost scales directly with how far the failure progressed before it was addressed. Isolated blistering across a small percentage of the fence can often be handled by sanding those areas, spot cleaning, and blending new stain into the sound finish. That approach works when the underlying wood is dry and structurally solid, and it costs a fraction of a full refinish. Once peeling covers a meaningful share of the surface, spot repair stops making sense both visually and technically, because the color and sheen difference between old and new stain becomes obvious. At that point the correct answer is stripping the failed coating and starting from clean wood. Stripping is labor intensive, and it is the step that turns a routine maintenance job into a substantially larger project.
Solid stains raise the cost ceiling considerably compared to penetrating semi transparent products. A solid stain forms a genuine film, and a failed film has to be removed rather than simply worn away or covered. Chemical strippers, extensive sanding, and careful neutralization are all part of that process, and the work has to be complete before any new product goes down. This is one of the practical reasons many professionals prefer penetrating stains on fences in the first place. Penetrating products fade and wear rather than peel, which makes future maintenance a wash and recoat instead of a strip and rebuild. Choosing the right product class at the start controls what your maintenance looks like for the next decade.
Board replacement is the expense homeowners least expect and most want to avoid. Wood that stayed wet through multiple freeze cycles can develop rot, particularly at ground contact and at rail connections where water sits. Replacement boards also present a color matching challenge, since new wood accepts stain differently than boards that have already weathered several seasons. New lumber needs its own drying period before it can be stained, which can delay the whole project by weeks. Preventing all of this comes down to timing the original work correctly and keeping up with recoating on schedule. If your fence came through last winter looking rough and you want it handled correctly before the next one, click here to learn more about our exterior painting and staining services.
Why You Need Professional Fence Staining Before the First Hard Freeze
Fall is the right season to stain a fence in North Texas, but only within a fairly narrow and well managed window. September and October usually deliver moderate temperatures, lower humidity than midsummer, and enough daylight for a full cure before nightfall. Waiting until late November stacks the odds against you, because cure windows shorten, dew points climb closer to surface temperatures, and freeze risk becomes real. A professional crew builds the schedule around moisture readings and the actual forecast rather than around convenience. Getting this right once means your fence enters winter sealed, sheds water instead of storing it, and comes out in spring looking essentially the same as it did in October.
The Right Fence Staining Schedule for Fall in Plano
Planning backward from the average first freeze is the most reliable way to schedule fence staining in Plano. DFW typically sees its first thirty two degree night somewhere between the middle and end of November, though the date shifts year to year. Full cure for most quality stains takes anywhere from two to seven days depending on product and temperature, so the work needs to be finished well before that first cold night. Building in a cushion of two to three weeks covers early cold fronts and the occasional stretch of rain that pauses everything. Booking in September or early October gives you real schedule flexibility instead of a scramble.
The prep timeline has to be included in that plan, not tacked on. Cleaning and brightening happen on their own day, and the fence then needs two to four days of dry weather before any stain touches it. New fences require far more lead time, since pressure treated lumber may need several weeks or several months to reach an acceptable moisture level. A fence built in August might be ready by late October; a fence built in October probably is not staining until spring. Forcing the schedule to meet a preferred date instead of a moisture reading is the root of most freeze related failures.
Weather monitoring continues right through the job. We check the full extended forecast before starting, watch overnight lows across the cure period, and stop work when conditions move outside the product specification. A day that starts at sixty degrees but drops to thirty eight overnight is not a usable staining day for most water based products. Sometimes the professional answer is to wait until spring, and telling a customer that honestly costs less than redoing failed work in March. Homeowners across Allen, Parker, and Addison get the same straight assessment from us regardless of what it does to our calendar.
Fence Staining Products and Application That Survive Winter
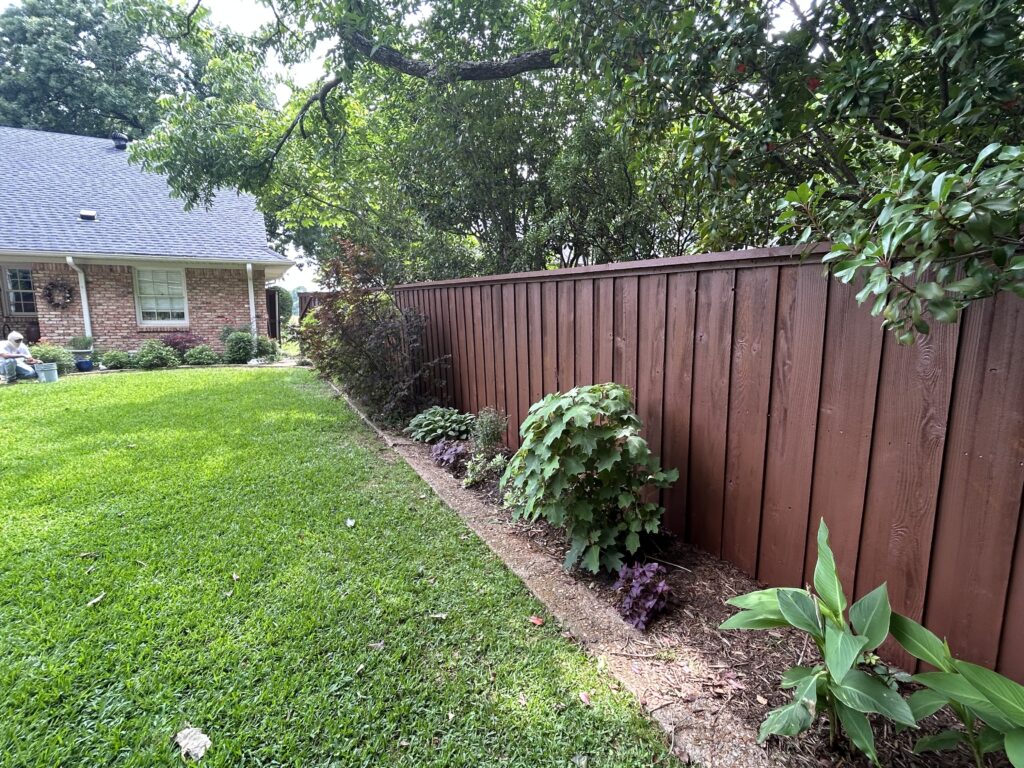
Product selection should follow the wood, the exposure, and the maintenance you actually want to perform. Semi transparent penetrating oil stains remain the workhorse for fences because they soak into the fiber, allow vapor movement, and wear away evenly rather than peeling. They show the grain, they recoat without stripping, and they handle freeze thaw stress far better than film forming products. Solid stains deliver more color and more UV protection but bring the peeling and stripping problems described earlier. For most fences in Plano the penetrating option produces better long term results with less future labor.
Pigment load matters more than most people realize, especially under Texas sun. Ultraviolet light breaks down the lignin that binds wood fibers together, and pigment is what blocks that radiation. Clear sealers offer very little UV protection and typically need recoating every year, sometimes sooner on south and west exposures. A stain with meaningful pigment content protects the wood surface and holds color for three to five years on a well prepared fence. Choosing a color a shade or two deeper than you want at first is often smart, since fences lighten over time.
Application details separate a finish that lasts from one that looks good for a season. Every surface gets coverage, including the tops of pickets, the undersides of rails, and both sides of the fence when access allows. End grain gets extra product because it drinks moisture at a much higher rate than face grain. Back brushing after spraying is not an optional refinement; it is the step that drives stain into the wood instead of leaving it sitting on top. We also keep an eye on spread rate, because over applying a penetrating stain leaves sticky residue that never fully cures.
Why Choose Venture Painting for Fence Staining in Plano
Venture Painting has built its reputation on detailed prep work, and fence staining is the clearest example of why prep decides everything. We take moisture readings before we quote, we clean and brighten properly, and we schedule around the wood rather than around the calendar. Our crews show up clean, organized, and respectful of your property, and we protect landscaping, patios, and adjacent surfaces before any product comes out. Estimates are free, and our pricing is clear and honest with no vague line items. If a fence is not ready to stain, we say so and give you a realistic timeline.
Serving Plano and the surrounding high value communities means we know how these fences behave in this specific climate. We work with the wood species, soil conditions, sprinkler patterns, and freeze cycles that show up here year after year. That local experience shapes product selection, timing, and the maintenance advice we hand you at the end of the job. Our interior and exterior painting specialists apply the same standard to a fence that they apply to a full exterior repaint. The result is a finish that holds up through the freeze instead of failing in February.
Fall booking fills up quickly, and the usable staining window closes faster than most people expect once the cold fronts start arriving. Give us a call and we will look at the fence, measure moisture, and tell you honestly what needs to happen before winter. You can also click here for our fence staining service page to see how we handle the process from cleaning through final coat. Reach the team at (214) 233-6044 or email zeb@venturepaintingdfw.com to schedule a free estimate at 2113 Northcrest Dr, Plano, TX 75075. Get the wood sealed correctly this fall and the first hard freeze becomes a non event.