

Why Your Ceilings Look Dingy Even After You Repaint The Walls
You finished painting the walls, stepped back to admire the work, and then noticed the ceiling looked worse than it did before you started. This happens to homeowners in Plano constantly, and it is not your imagination playing tricks on you. Fresh wall paint reflects light in a clean, uniform way that exposes every flaw sitting above it, so a ceiling that looked acceptable last week now reads as yellowed, patchy, or gray. Most ceilings collect a decade of cooking grease, candle soot, cigarette residue, HVAC dust, and humidity staining before anyone thinks to look up at them. The problem gets worse in older Collin County homes where the original builder-grade flat white was applied thin over new drywall and never touched again. Ceiling paint also breaks down differently than wall paint because it sits in the path of rising heat and moisture all day long. Repainting the walls without addressing the ceiling is a bit like putting on a clean shirt over a stained undershirt; the contrast makes the older surface look dramatically worse than it did in isolation. The good news is that a dingy ceiling is almost always fixable, and understanding what actually caused the discoloration determines which fix will hold.
What Makes Ceilings Look Dingy After Painting The Walls
Ceiling discoloration comes from a short list of predictable sources, and identifying which one you are dealing with matters more than picking a brand of paint. Airborne contaminants settle upward through convection, meaning your ceiling absorbs whatever your household produces long before your walls show any change. Sunlight, artificial light, and the reflectivity of your new wall color all change how the eye perceives the ceiling above it. A ceiling that reads as neutral white next to beige walls will look distinctly yellow next to a crisp, cool white. Texture compounds everything because popcorn, knockdown, and orange peel finishes trap particles in thousands of tiny shadowed pockets. Understanding the cause tells you whether the ceiling needs cleaning, priming, sealing, or a full repaint with the correct sheen. Guessing wrong means the discoloration bleeds right back through within weeks.
The Real Causes Behind A Dingy Ceiling After You Repaint The Walls
Cooking is the single largest contributor to ceiling discoloration in most North Texas homes, and it affects far more than the kitchen. Vaporized cooking oil travels on warm air currents and settles as a thin, sticky film across ceilings throughout the connected living space, which is why open-concept floor plans built in the last twenty years show this problem so clearly. That film attracts and holds dust, and over several years it oxidizes into the amber tint homeowners describe as dingy or smoky. Range hoods help, but a recirculating hood that vents back into the room rather than outside does very little for this specific issue. Homes that use gas cooktops tend to show heavier deposits than homes with electric ranges because gas combustion adds its own particulate load to the air. Candles, fireplaces, and incense do the same thing in a more concentrated way, often leaving a visible halo above wherever they are burned most often. If you run your hand across a discolored kitchen or living room ceiling and it feels slightly tacky rather than chalky, you are dealing with a grease film rather than simple dust.
HVAC systems create a second and very different pattern of ceiling grime that most people mistake for a paint failure. Supply registers push conditioned air out at speed, and that air carries fine particulate that deposits along the ceiling wherever airflow slows or turns. This produces the dark streaking and shadowy fanning you see radiating out from vents, a phenomenon that professionals call ghosting or thermal tracking. Return vents pull air toward them and create their own dirty patterns, usually darker and more concentrated at the perimeter. Cheap fiberglass filters allow far more of this particulate through than a pleated filter rated for finer capture, so filter quality directly affects how quickly ceilings dirty. Homes with poor attic insulation show a related pattern where the ceiling framing members appear as darker lines through the paint, caused by temperature differences that make dust cling more readily to the cooler drywall between joists. Once you know what thermal tracking looks like, the striping pattern becomes obvious and clearly distinguishable from ordinary staining.
Moisture and light exposure round out the list of common causes, and both are heavily seasonal in this part of Texas. Summer humidity combined with a hard-working air conditioner creates condensation cycles in poorly ventilated bathrooms and laundry rooms, and repeated wetting causes flat ceiling paint to yellow and lose its brightness. Roof leaks, condensation on attic ductwork, and old plumbing above the ceiling all leave tannin stains that migrate through fresh paint if they are not sealed first. Ultraviolet light through skylights and large windows causes the resins in older oil-based ceiling paints to yellow noticeably, which is why some ceilings look whitest in the darkest corners of the room. Water-based paints resist this yellowing far better, but a great many homes built before the early 2000s still carry oil-based coatings up top. Smoke damage from a past kitchen fire or a previous owner who smoked indoors leaves a stain that will bleed straight through standard latex primer, sometimes within hours. Every one of these causes requires a different preparation approach, which is exactly why so many homeowner ceiling repaints fail on the first try. Diagnosing before painting saves an entire second round of work.
Why New Wall Paint Makes A Dingy Ceiling Look Even Worse
Perception plays a significant role here, and it is worth understanding because it explains why the ceiling seemed fine before you touched anything. Fresh paint has a higher light reflectance value than aged paint because the binders have not yet oxidized and the surface has not accumulated any soil. When your walls suddenly bounce more light around the room, that light hits the ceiling at every angle and reveals contamination that dimmer, older walls were politely hiding. The effect intensifies with lighter and cooler wall colors, so anyone who just repainted in a crisp white or a soft gray will notice the ceiling problem immediately. Warmer wall tones like greige and tan tend to mask ceiling yellowing because the undertones are closer together. This is not a defect in your work; it is simple optics doing exactly what optics do.
Color temperature relationships create the second half of the problem, and this trips up even experienced painters. Most ceiling paints are formulated in a bright, slightly cool white, while wall colors chosen today skew warm or neutral. A ceiling that has yellowed over ten years has drifted warm, and placing it above a cool-toned wall makes that warmth read as dirty rather than as a deliberate design choice. The human eye judges color by comparison rather than in absolute terms, so the ceiling did not change when you painted the walls; the reference point did. Designers use this intentionally when they tint ceiling paint slightly toward the wall color to create harmony, but an accidental mismatch produces the opposite effect. Sheen differences add another layer because flat wall paint and flat ceiling paint scatter light almost identically, while an eggshell or satin wall finish creates a visible break at the ceiling line.
Cut lines also draw attention upward in ways homeowners do not expect. When a painter cuts a clean, sharp line where the wall meets the ceiling, the eye follows that line around the entire room and lands on the ceiling plane repeatedly. A sloppy or wandering cut line does the same thing for worse reasons, and paint that crept onto the ceiling leaves visible witness marks that catch light from below. Any patch, roller mark, or lap line on the ceiling becomes far more noticeable once there is a fresh, crisp boundary beneath it. Older ceilings frequently have touch-up spots from past repairs that were never blended properly, and these flash into visibility the moment surrounding conditions change. Popcorn and heavy texture hide some of this, but they also collect the most grime and are the hardest to clean without damage. In practical terms, painting walls without the ceiling almost always creates a visual debt you will end up paying later. Most homeowners who call us about dingy ceilings finished their walls within the previous month.
How To Tell Whether Your Dingy Ceiling Needs Cleaning Or Repainting
Start with a simple test in an inconspicuous corner using a damp white cloth and a small amount of mild dish soap. Wipe a small area gently and look at the cloth; heavy transfer of brown or yellow residue means you have surface soil that cleaning can meaningfully improve. If the cloth comes back clean but the discoloration remains in the paint film itself, the pigment has changed and no amount of washing will restore it. Chalking is another telltale sign, showing up as fine white powder on the cloth, which indicates the paint binder has broken down and the surface must be primed before recoating. Test in multiple rooms because kitchen ceilings and bedroom ceilings often need completely different treatments in the same house. Take photos before and after your test wipe so you can judge the improvement honestly rather than by memory.
Water stains require their own assessment, and this is where many homeowners waste both time and money. A ring-shaped brown stain with a defined edge indicates a past or ongoing leak, and painting over it without a stain-blocking primer guarantees it reappears. Press the area with your fingertips to check for softness or give, which would suggest the drywall itself is compromised and needs replacement rather than paint. Active moisture will feel cool and may show slight sagging along the drywall seams. Any stain that has spread since you last looked at it points to a current leak, and that plumbing or roofing issue has to be resolved before any painting begins. Shellac-based primer is the reliable choice for sealing dried water stains, since standard latex primer allows tannins to migrate through within days.
Texture type determines your realistic options more than anything else. Smooth and lightly textured ceilings clean reasonably well with a soft sponge and gentle cleaner, and they accept a fresh coat of paint without complications. Popcorn ceilings cannot be scrubbed at all because the aggregate releases from the substrate with almost no pressure, leaving bare patches that are difficult to blend. Spraying is the preferred application method for heavy texture since rolling pulls the material loose and creates a mess overhead. Knockdown and orange peel finishes fall in the middle, tolerating light cleaning and rolling with a thick nap cover. Ceilings in homes built before 1980 may contain asbestos in the texture material and should be tested before any sanding, scraping, or aggressive cleaning takes place. When cleaning delivers only marginal improvement, repainting the ceiling is nearly always the more economical path because you spend the same labor either way. Need help getting your ceilings and walls to match again? Click here for our interior painting service.
How To Properly Paint A Dingy Ceiling So It Stays Bright
Painting a ceiling correctly is a different job than painting walls, and the differences matter enormously for the final result. Gravity works against you, coverage is harder to judge from below, and lap marks show far more readily on a horizontal plane lit from the side. Ceiling paint is formulated with higher viscosity and more hiding pigment specifically to address these challenges, so using leftover wall paint is a false economy. Preparation carries even more weight overhead than it does on walls because contamination interferes directly with adhesion. A ceiling painted over grease will peel, and a ceiling painted over a water stain will show that stain again. The right sequence of cleaning, priming, and coating produces a ceiling that stays bright for a decade or more. Skipping steps produces a ceiling that looks dingy again within a season.
Preparing A Dingy Ceiling Before You Repaint It
Degreasing comes first in any kitchen, dining area, or open living space, and it is the step homeowners skip most often. A solution of trisodium phosphate substitute or a dedicated degreasing cleaner cuts through cooking film in a way that plain soap and water simply cannot manage. Work in manageable sections, apply with a sponge mop on an extension pole, and rinse thoroughly with clean water so no cleaner residue remains behind. Residual cleaner interferes with paint adhesion just as badly as the grease you removed, so the rinse step is not optional. Allow the ceiling to dry completely before proceeding, which typically takes several hours with good air movement in Texas humidity. Skipping degreasing is the single most common reason a freshly painted ceiling starts yellowing again within months.
Repairs follow cleaning, and this is your opportunity to address every flaw that will otherwise show up in raking light. Nail pops, hairline cracks along drywall seams, and small dents all become glaringly obvious once a uniform fresh coat goes on. Set popped fasteners below the surface, add a new screw a few inches away to secure the panel to framing, and patch with a setting-type compound rather than lightweight spackle. Feather each patch wide, sand smooth, and blend surrounding texture to match so repairs disappear rather than announcing themselves. Cracks that reopen seasonally may indicate foundation movement, which is common in the expansive clay soils across Plano and Richardson and worth mentioning to your painter. Dust the entire ceiling after sanding using a vacuum brush attachment, because sanding dust prevents proper adhesion and shows as grit in the finished film.
Priming is what separates a ceiling that stays bright from one that fades back to dingy. Stain-blocking shellac primer handles water rings, smoke damage, tannin bleed, and nicotine staining that latex products cannot contain. Spot priming works for isolated stains, but heavily contaminated ceilings benefit from a full prime coat that creates a uniform substrate for the topcoat. Bare drywall patches absorb paint at a completely different rate than surrounding painted areas, and without primer those spots flash as dull patches through the finish coat. Choose a primer tinted close to your final ceiling color if you are covering a significantly darker or heavily stained surface. Mask walls, floors, and fixtures thoroughly beforehand, because shellac primer removes only with denatured alcohol and it will find any surface you failed to cover. Good preparation typically consumes more time than the painting itself, and that ratio is exactly what you should expect from a quality job.
Choosing The Right Paint And Sheen For A Ceiling That Will Not Look Dingy
Flat sheen remains the standard choice for ceilings, and there are good technical reasons behind that convention. Flat paint scatters light in all directions rather than reflecting it, which visually hides minor imperfections in the drywall plane and any texture inconsistencies. Ceilings receive light at oblique angles from windows and fixtures, and any sheen at all will highlight every roller mark and surface irregularity. Modern flat ceiling paints have improved substantially in washability compared to formulas from twenty years ago, so the traditional durability tradeoff has narrowed considerably. Dedicated ceiling paint also includes a spatter-resistant additive and often a color-change indicator that dries from pink to white, both of which make overhead application far more manageable.
Bathrooms, laundry rooms, and kitchens deserve an exception to the flat rule. These rooms generate sustained moisture and need a coating that resists mildew growth and tolerates occasional wiping, which points toward a matte or eggshell finish with a mildewcide additive. The slight sheen increase is a reasonable tradeoff for a ceiling that will not develop black spotting above the shower within two years. Proper ventilation matters just as much as paint selection here, so run the exhaust fan during and after every shower and verify that it actually vents outside rather than into the attic. A bathroom fan discharging into an attic space creates ongoing ceiling problems no coating can solve.
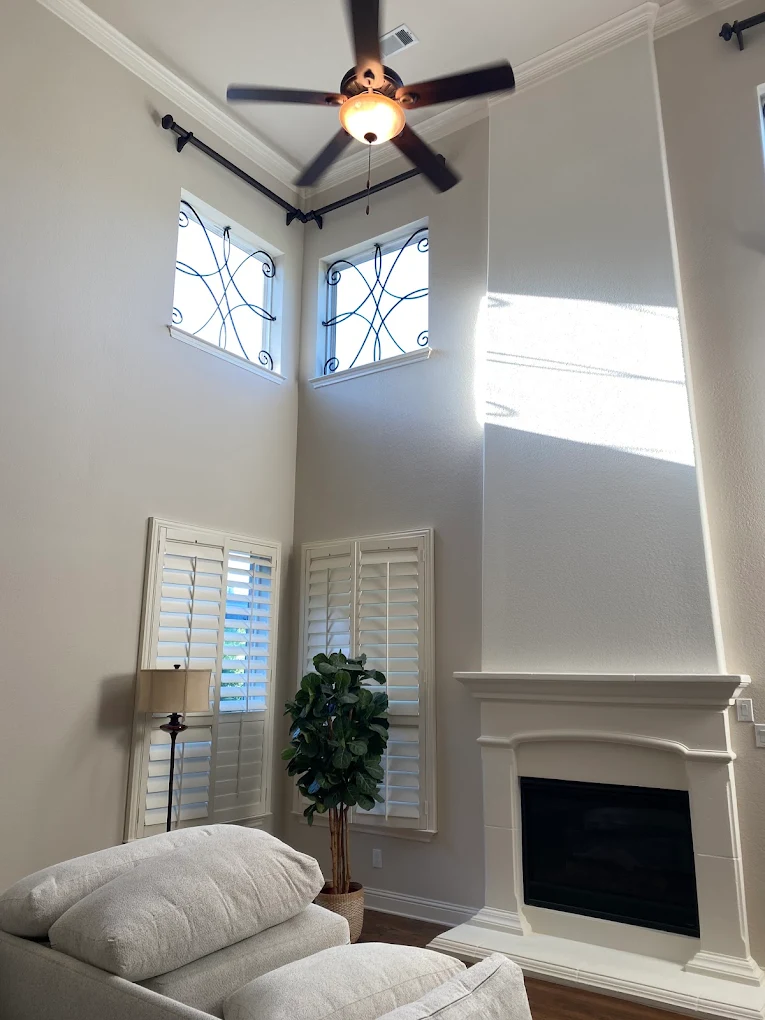
Color selection deserves genuine thought rather than defaulting to whatever the store labels as ceiling white. Pure bright white works beautifully with cool wall colors and in rooms with abundant natural light, but it can read as harsh and stark against warm walls. Many painters tint ceiling paint to roughly a quarter or half strength of the wall color, which produces a soft, cohesive look that keeps the ceiling reading as clean without creating a jarring contrast. Rooms with low ceilings benefit from lighter values overhead because a bright ceiling visually lifts the plane and opens the space. Rooms with tall or vaulted ceilings can carry slightly deeper tones without feeling closed in. Sample a small section and observe it across a full day, since Texas afternoon light shifts dramatically and a ceiling color that looks perfect at noon can turn distinctly yellow by evening. Not sure which colors work together in your home? Click here for our interior painting service and we will walk you through the options.
How Professional Painters Keep Ceilings From Looking Dingy Again
Application technique determines whether a ceiling looks uniform or blotchy, and overhead work is unforgiving of shortcuts. Professionals maintain a wet edge by working in sections that can be completed before the paint begins to set, which in warm Texas conditions means moving efficiently and planning the sequence in advance. Rolling in a consistent direction and then back-rolling perpendicular to that direction evens out the film and eliminates the directional striping that shows under angled light. Nap thickness matters and should match the texture, with a three-eighths inch cover for smooth ceilings and up to three-quarters for heavy knockdown. Loading the roller properly and avoiding overspreading ensures the film builds to the thickness the manufacturer specified for full hiding.
Two coats is the standard for any ceiling that started out discolored, and one coat over a dingy surface almost never delivers acceptable results. The first coat seals and unifies, while the second builds the film thickness that gives the ceiling its depth and longevity. Recoat windows vary by product and by humidity, and applying a second coat too early lifts the first and creates a mottled appearance. Ambient conditions matter more than most homeowners realize, since high humidity extends dry times considerably and a running air conditioner can create airflow that dries edges too quickly. Professionals adjust their pace and their scheduling around these variables rather than fighting them.
Ongoing maintenance keeps a bright ceiling bright, and small habits make a substantial difference. Replace HVAC filters on schedule with a pleated filter rated for fine particulate, which directly reduces the airborne load settling overhead. Run kitchen and bathroom exhaust fans consistently and confirm they vent outdoors rather than into an attic. Dust ceilings once or twice yearly with a microfiber duster on an extension pole, focusing on areas near vents and above cooking surfaces. Address any roof or plumbing leak the moment you notice a stain, because the longer moisture sits the deeper the tannins migrate into the drywall. With reasonable care, a properly prepared and painted ceiling holds its appearance for ten to fifteen years in a typical Plano home.
Why You Need A Professional For Dingy Ceiling Painting In Plano
Ceiling work is physically demanding, technically particular, and difficult to correct once it goes wrong. Overhead application tests your shoulders and your neck, and fatigue leads directly to the uneven coverage that makes ceilings look worse than before. Access is another real issue in homes with vaulted ceilings, stairwell landings, and two-story entryways where ladders alone will not safely reach. Professionals bring the staging, the spray equipment, and the experience to diagnose whether you are dealing with grease, thermal tracking, water damage, or simple age. That diagnosis determines the prep, and the prep determines whether the result lasts a decade or fails within a season. Venture Painting handles ceiling work throughout Plano and the surrounding communities every week.
What You Get From Professional Dingy Ceiling Painting Services
A professional assessment starts with identifying the actual cause of your ceiling discoloration rather than assuming it is one thing. We check for grease film, examine airflow patterns near registers, test suspicious stains for active moisture, and evaluate texture type and condition. That information shapes a specific plan covering the cleaning method, the primer selection, and the number of coats your particular ceiling requires. You get a clear explanation of what we found and why we are recommending a given approach before any work begins.
Protection of your home is a core part of the service, and ceiling work generates more mess than any other interior painting task. We mask and cover floors, furniture, fixtures, and finished walls completely, and we remove or protect light fixtures and ceiling fans rather than cutting awkwardly around them. Spray application produces superior results on textured ceilings but demands thorough containment, which is exactly what our crews set up as a matter of routine. Everything gets cleaned up daily so your home stays livable throughout the project.
Quality materials and correct application round out what you are paying for. We use dedicated ceiling paint from established manufacturers, not repurposed wall paint, and we select primers based on what your ceiling actually needs. Coverage is verified under proper lighting from multiple angles before we call a room finished, because ceiling flaws hide easily under work lights and appear later in daylight. Free estimates with clear, honest pricing mean you know the full scope and the full cost before we start.
When To Schedule Professional Dingy Ceiling Painting
Late summer and early fall are excellent times for interior ceiling work in North Texas. Outdoor projects slow as temperatures peak, interior schedules open up, and running the air conditioner provides the controlled environment that helps paint cure predictably. Getting ceilings handled now means your home looks its best heading into the holiday season when guests actually notice these things.
Coordinate ceiling work with any other interior painting you are planning, because doing both at once saves substantial money on setup and masking. Ceilings should always be painted before walls, since overspray and drips fall downward and any ceiling paint that reaches the wall gets covered by the subsequent wall coat. Homeowners who paint walls first and ceilings later end up paying for careful cutting and additional touch-up that could have been avoided entirely with the right sequence.
Selling a home makes ceiling condition an urgent priority rather than a nice-to-have. Buyers and inspectors look up, and a yellowed or stained ceiling suggests deferred maintenance and unresolved moisture problems even when neither is true. Fresh, uniform ceilings photograph well and make rooms read as larger and brighter in listing photos. Planning a bigger refresh across your whole home? Click here for our interior painting service to see everything we cover.
Why Choose Venture Painting For Your Dingy Ceiling Painting Project
Venture Painting has built its reputation in Plano on detailed prep work that produces long lasting results. We do not skip degreasing, we do not spot prime when a full prime coat is warranted, and we do not apply a single coat where two are required. That approach costs us a little more time on every job and saves our customers from repainting the same ceiling twice.
Our crews are clean, organized, and respectful of your home. We show up when we say we will, we protect your belongings, and we leave each space tidy at the end of every day. You get a friendly, professional team that communicates clearly about scope, timeline, and anything unexpected we find once work is underway.
We serve Plano and the surrounding high-value communities including Richardson, Allen, Addison, Murphy, Parker, Sachse, and Dallas, and we specialize in both interior and exterior painting. Free estimates come with clear, honest pricing and no pressure. Call Venture Painting at (214) 233-6044 or email zeb@venturepaintingdfw.com to schedule your free ceiling assessment, and we will show you exactly what is causing the discoloration and what it will take to fix it permanently.