

The Nail Pops And Hairline Cracks That Appear When Temperatures Drop
Every fall in North Texas, homeowners start noticing small round bumps along their ceilings and thin lines running out from the corners of their door frames. Nothing dramatic happened, no one bumped the wall, and the house has been standing quietly for years, yet the drywall suddenly looks tired. The cause is almost always seasonal movement, and it follows a predictable pattern once the overnight temperatures start falling and the heat begins running again. Wood framing loses moisture in dry winter air, the soil under the slab changes volume as the weather shifts, and the drywall attached to that framing has to go somewhere. Nail pops and hairline cracks are the visible result of a house doing exactly what houses do. The good news is that both problems are cosmetic in the vast majority of cases, and both respond very well to a proper repair followed by the right primer and paint. The bad news is that a quick smear of joint compound over the bump will fail again by spring, which is why the repair method matters as much as the paint that goes over it.
What Causes Nail Pops and Hairline Cracks When Temperatures Drop
Understanding the mechanism behind seasonal drywall damage makes the repair far more effective, because the fix has to address the movement and not just the blemish. Framing lumber in a typical Plano home was installed with a certain moisture content, and that lumber continues to give up moisture for years afterward. When the furnace starts running in October and November, indoor humidity falls sharply, and the studs, joists, and trusses shrink a little more. The drywall stays where it is while the wood pulls away, so the fastener head that was buried under three coats of compound gets pushed forward until it breaks through the surface. Cracks work on the same principle, forming wherever stress concentrates and the panel has a weak point to relieve it. Doors, windows, and the joint between wall and ceiling take the brunt of that stress every single season.
How Cold Weather Causes Nail Pops in Drywall
A nail pop starts long before you can see it, and it starts inside the framing rather than on the surface of the wall. Builders fasten drywall panels to studs and joists, then bury each fastener head under a dimple of joint compound that gets feathered and sanded until it disappears under the paint. As the lumber behind that panel dries out over the first several heating seasons, it shrinks across its width, and the shank of the fastener no longer sits as deep in the wood as it once did. The panel itself is held in place by every other fastener around it, along with the adhesive bond of the finish and the paint film, so the wood moves and the drywall largely does not. That difference in movement pushes the fastener head forward by a small fraction of an inch, which is more than enough to crack the brittle compound covering it. What you see is a round bump, sometimes with a ring of hairline cracking around it, and sometimes with a small chip of compound already sitting on the carpet below.
Older homes built with drywall nails see this far more often than newer construction fastened with screws, since a smooth nail shank has very little holding power once the wood around it shrinks. Screws hold better because the threads bite into the framing and resist backing out, but they are not immune, especially when the framing was damp at the time of installation. Ceilings tend to show nail pops before walls do, partly because gravity works against the panel and partly because attic framing goes through much wider temperature and humidity swings than the conditioned space below it. In a Plano attic, a January morning can be thirty degrees while the living room below sits at seventy, and that difference drives real movement through the framing. Homes with long unbroken ceiling runs, such as open living areas and hallways, often show a line of pops that follows a single joist across the room. Once you spot one, it is worth walking the whole ceiling with a light held at a low angle, because raking light reveals pops that straight on lighting hides completely.
There is also a specific winter phenomenon called truss uplift that gets blamed on foundation problems far more often than it deserves. In a home framed with roof trusses, the top chord sits high in a cold and relatively humid attic while the bottom chord is buried in insulation and stays warmer and drier. The top chord absorbs moisture and lengthens slightly, the bottom chord dries and shortens slightly, and the truss arches upward through the winter months. Because the truss is anchored at the exterior walls, the middle of it lifts away from interior partition walls, opening a clean gap where the ceiling meets the top of the wall. The gap closes again in spring as conditions reverse, which is the giveaway that you are looking at truss uplift rather than structural failure. Homeowners who patch that joint with rigid compound every winter watch it crack open again every winter, and the correct solution is a flexible detail rather than a harder patch.
Why Hairline Cracks Appear When Temperatures Drop
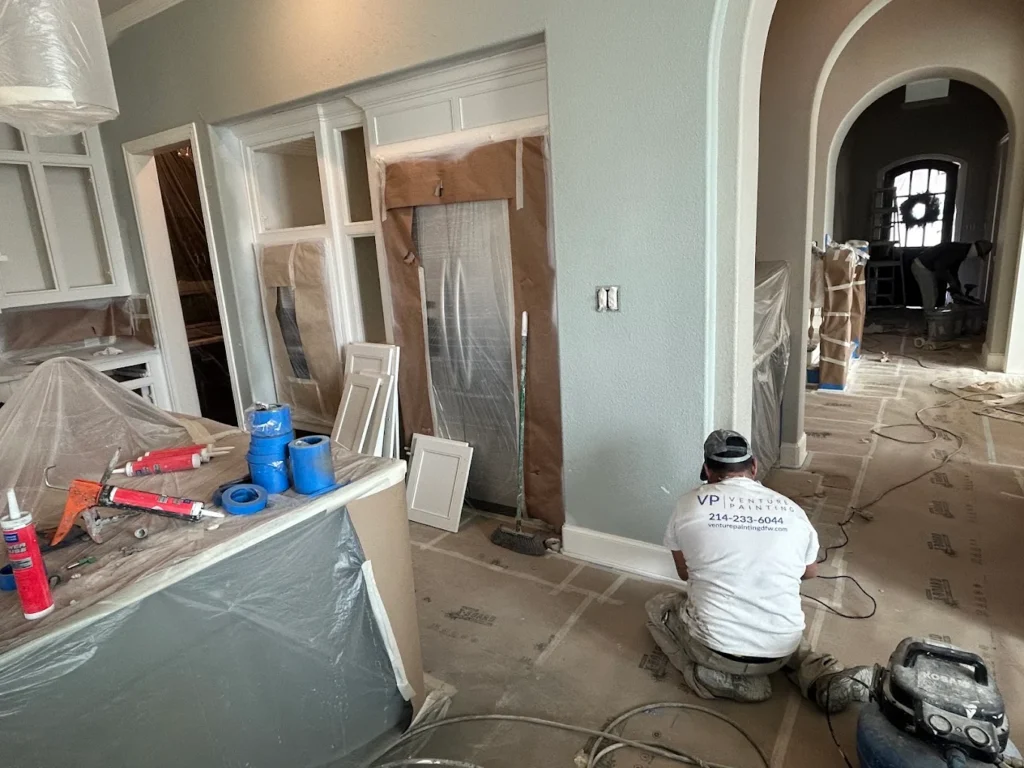
Hairline cracks follow the path of least resistance through a wall assembly, which is why they show up in the same handful of places in almost every house. The corners of door and window openings are the most common location by far, because those openings interrupt the continuous surface of the drywall and concentrate stress at four sharp points. When any part of the structure moves, the panel wants to flex, and the corner of that opening is where the flexing has to go. A crack that runs diagonally up and out from the top corner of a door frame is the classic signature of ordinary seasonal movement. The same thing happens at the corners of arched openings, at the ends of long walls, and above wide cased openings between rooms. These cracks are usually narrow enough that a fingernail barely catches on them, and they often stay the same width for years while opening and closing slightly with the seasons.
The soil under a North Texas home plays a large role in the timing of all this, and it is the reason cracks tend to arrive in waves rather than gradually. Plano, Richardson, Allen, and most of the surrounding area sit on expansive clay that swells when it takes on water and shrinks when it dries out. A hot dry summer pulls moisture out of that clay and the soil contracts, then autumn and winter rains rehydrate it and the soil expands again. The slab rides on that soil and moves with it, which transfers movement up through the framing and into the drywall. Homeowners who let their foundation watering slip during a dry stretch often see the most cracking, because the swing between dry and wet becomes much larger. Consistent soil moisture around the perimeter of the house is one of the few things a homeowner can do that genuinely reduces seasonal cracking.
Taped joints between drywall panels are the other frequent crack location, and they tell you something specific about how the house was finished. A properly bedded paper tape joint is stronger than the drywall panel itself, so a crack running straight down the center of a seam usually means the tape was starved of compound during installation or that the joint has been asked to absorb more movement than it can handle. Butt joints, where the factory edges of two panels do not meet, are the weakest seams in any wall and crack more readily than tapered joints. Ceiling seams crack more than wall seams for the same reasons that ceilings pop more than walls. In homes with vaulted ceilings, the long seam where the slope meets a flat section takes a great deal of stress and frequently shows a fine line after the first cold snap. None of this indicates a failing house, but all of it needs the right repair method to stay closed.
Where Nail Pops and Hairline Cracks Show Up First When Temperatures Drop
If you want to find seasonal drywall damage early, there is a short list of places worth checking as soon as the weather turns. Start with the ceilings in the largest rooms, since long spans of framing produce the most movement and open rooms give that movement nowhere to hide. Hallway ceilings are another reliable spot because they are narrow, brightly lit, and often run perpendicular to the joists above. Look at the top corners of every interior door, then at the corners of windows on the walls that get the most sun exposure. Check the joint where the ceiling meets interior walls, particularly walls that run down the middle of the house rather than along the exterior. Garage ceilings and walls show damage earlier and worse than anywhere else, since that space is unconditioned and swings through the full range of outdoor temperature.
Lighting changes everything when you are hunting for this kind of damage, and most people miss half of it because they inspect at the wrong time of day. Hold a work light or a phone flashlight nearly flat against the surface and sweep it across the wall, which throws long shadows off every bump and line. Overhead lighting washes the surface out and makes a wall look flawless right up until you paint it and the sheen reveals everything. This is exactly why professional painters inspect surfaces with raking light before they ever open a can, and why a wall that looked fine can suddenly look rough after a fresh coat. Rooms with large windows and low winter sun angles give you the same effect for free in the late afternoon. Mark every defect you find with a light pencil tick or a small piece of tape so nothing gets missed during the repair.
Certain rooms deserve extra attention because their conditions accelerate movement and make problems more visible. Kitchens and bathrooms swing through large humidity changes several times a day, and those swings work on drywall joints just like seasonal changes do on a longer cycle. Rooms directly under an attic access hatch often show damage around the opening, since the framing there is interrupted and the hatch itself leaks conditioned air. Bonus rooms over garages sit between two very different thermal environments and are among the most crack prone spaces in any house. Walls that share space with a fireplace or a chimney chase see concentrated movement as well. Seeing nail pops spreading across your ceiling this fall? Click here for our drywall repair service.
How to Repair Nail Pops and Hairline Cracks the Right Way
The difference between a repair that lasts a decade and one that reopens by March comes down to method, materials, and patience. Almost every failed drywall patch shares the same two causes, which are inadequate refastening and compound applied too thick in too few coats. A nail pop that is simply covered over leaves the loose fastener in place, still ready to push forward the next time the framing shrinks. A crack that is filled without being opened up and reinforced has nothing holding the two sides together, so the next season of movement splits it right back open along the same line. Proper repair takes more steps than most homeowners expect, and each of those steps has a specific job. It also takes drying time between coats, which is the single hardest part for anyone hoping to finish a room in one afternoon.
The Right Way to Repair Nail Pops in Drywall
The correct nail pop repair begins with securing the panel rather than hiding the bump, and that means adding a fastener before touching the popped one. Drive a drywall screw into the same framing member about one and a half to two inches above or below the pop, and set it just deep enough that the head dimples the paper without tearing through it. A screw that breaks the paper face has almost no holding power, so the depth setting matters more than the torque. With the panel pulled tight again, the original fastener can be dealt with, and there are two acceptable approaches depending on what is there. A protruding nail can be driven back below the surface with a nail set, though many finishers prefer to pull it entirely and fill the void. A screw that has backed out should be removed completely rather than driven deeper, since the wood around it is often stripped and it will simply back out again.
Once the fastener situation is resolved, all loose material has to come off before any new compound goes on. Scrape away the cracked ring of old compound with a putty knife until you reach a sound edge, and knock down any raised paper burrs around the hole. Applying fresh compound over loose flaking material guarantees a repair that pops off later in one clean disc, which is a frustrating and very common outcome. The first coat should be thin and pressed firmly into the dimple to fill it completely, not mounded up in an attempt to finish in one pass. Thick compound shrinks as it dries and cracks in the middle, which is why three thin coats beat one heavy coat every time. Allow full drying between coats, and expect at least a few hours for each in normal indoor conditions.
The second and third coats are about blending rather than filling, and this is where most amateur repairs give themselves away. Each successive coat should be feathered wider than the last, using a broader knife so the edges disappear into the surrounding surface. A repair spot roughly the size of a quarter should end up as a barely perceptible skim about eight to ten inches across when the last coat is done. Sand lightly with a fine grit sponge or paper, working the edges more than the center, and take care not to scuff the paper face of the surrounding drywall. Texture matching comes next in the many Plano homes finished with orange peel or knockdown, and that step is what separates a professional result from an obvious patch. A spray can of matching texture works for isolated spots, though larger areas usually need a hopper gun and a practiced hand to blend correctly.

The Right Way to Repair Hairline Cracks in Walls and Ceilings
Filling a hairline crack without opening it first is the most common mistake in drywall repair, and it fails almost every time. Compound cannot penetrate a crack narrow enough to be called hairline, so it sits on top like a thin skin with no mechanical grip on either side. The correct first step is to widen the crack slightly with the corner of a putty knife or a utility knife, creating a shallow V groove that gives the filler something to key into. Any loose paint film or crumbling compound along the edges needs to come off at the same time. The groove does not need to be deep, and cutting into the drywall core is unnecessary and counterproductive. What matters is having two clean shoulders and enough width for material to actually bond.
Reinforcement is the second requirement, because filler alone bridges a moving joint no better than the original paint did. Paper tape bedded in compound is the strongest option and remains the standard for seams and long cracks in walls and ceilings. Fiberglass mesh tape is easier to handle and works well when it is embedded in setting type compound rather than the premixed variety, since setting compound cures by chemical reaction and provides the rigidity that mesh lacks on its own. Setting compound is also the better choice for the first coat on any crack repair because it shrinks far less than lightweight premixed compound. After the tape coat cures, two additional coats of finishing compound go over it, each feathered wider than the last. The finished repair should span eight to twelve inches across for a typical wall crack, wider for ceiling seams, so the transition stays invisible under paint.
Cracks caused by ongoing seasonal movement need a different approach at one specific location, which is the joint between an interior wall and the ceiling. Rigid compound at that joint will crack again as soon as truss uplift returns the following winter, no matter how well the repair was executed. The standard solution is to release the drywall from the ceiling framing at that joint and let the ceiling panel move independently, then cover the joint with crown molding fastened to the ceiling only. A simpler alternative for homeowners who do not want molding is a bead of high quality flexible acrylic latex caulk at that joint, which stretches with the movement instead of fracturing. Caulk is a legitimate material at a moving inside corner and a poor material in the middle of a flat wall, so applying it in the right place is what counts. Rooms with repeated ceiling line cracks year after year are telling you they need the flexible detail rather than another round of compound.
Priming and Painting After Nail Pop and Hairline Crack Repair
A perfectly executed drywall repair can still look terrible after painting, and the cause is nearly always skipped primer. Fresh joint compound is far more porous than the surrounding painted surface, so it absorbs the binder out of the finish coat and dries to a different sheen and a slightly different color. The patch then telegraphs through as a dull spot in a satin wall or a shiny spot in a flat ceiling, an effect painters call flashing. A dedicated drywall primer or a quality latex primer sealer applied over every repair area evens out the porosity and gives the finish coat a uniform surface to sit on. Spot priming the patches is the minimum, and priming the full wall is better anywhere the repairs are numerous. Skipping this step is the reason so many homeowners repaint a room and still see every patch from across the space.
Sheen selection carries more weight on repaired surfaces than most people realize, especially on ceilings and large walls. Flat and matte finishes scatter light and hide minor surface irregularities, which is exactly why ceilings are almost universally painted flat. Satin, eggshell, and semigloss reflect light directionally and reveal every ripple, ridge, and feathered edge that is not perfectly blended. A wall with several repairs will look far better in a matte finish than in the eggshell it may have had before. Rooms that need washability, like hallways and kitchens, still benefit from a modern matte formulated for scrubbing rather than jumping straight to satin. Choosing the right sheen after a repair job is a design decision with real practical consequences.
Painting a repaired wall almost always means painting the full wall from corner to corner rather than spot painting the patch. Touch up paint rarely matches an aged surface, since existing paint has faded, collected a film of household dust, and cured to a slightly different sheen over the years. Even paint from the original can, stored properly, will show as a visible rectangle against the surrounding surface. Breaking at inside corners keeps the transition invisible because the change in light angle disguises any minor difference. Two finish coats over primed repairs produce the most uniform result and the most durable film. Planning to repaint after the patching is finished? Click here for our interior painting service.
Why You Need a Professional for Nail Pop and Hairline Crack Repair
Drywall repair looks straightforward on video and turns out to be one of the most skill dependent trades in residential work. The tools are inexpensive and the materials are cheap, yet the results vary enormously based on how the knife is handled and how well the finisher understands drying, shrinkage, and light. A homeowner can absolutely fix a single nail pop in a closet, and the same homeowner will spend an entire weekend making a living room ceiling look worse. Professional crews bring the right compounds for each stage, the sanding equipment to control dust, the texture skills to match existing finishes, and the painting knowledge to make the whole surface read as one. They also work through the sequence at the right pace, allowing proper cure time instead of rushing coats. When the repairs run across a whole floor of the house, that difference in method shows up in every room.
Why Nail Pop and Hairline Crack Repair Is Worth Doing Before You Paint
Repairing seasonal drywall damage before a repaint is far more economical than handling it afterward, because the crew is already set up and the surfaces are already protected. Furniture has been moved, floors are covered, and the room is staged for work, so adding patch repair to the scope costs a fraction of what a separate visit would. Painting over unrepaired pops and cracks locks the damage in under a fresh finish where it stands out more than it did before. New paint has a uniform sheen that highlights every irregularity in the surface beneath it, which is the opposite of what most homeowners expect. Addressing the drywall first means the paint job actually looks new rather than looking like new paint on an old wall.
There is a real property value argument as well, and it matters most for anyone planning to sell in the next year or two. Buyers and inspectors notice ceiling cracks and rows of nail pops immediately, and many read them as evidence of foundation trouble even when nothing structural is wrong. That perception can cost far more in negotiation than the repair would have cost to complete. A ceiling with clean flat surfaces and a properly matched texture removes the question entirely. Homes in Plano, Allen, and Murphy compete on presentation, and drywall condition is one of the first things a walkthrough registers.
Timing the work for late fall or winter has a practical advantage that experienced painters take seriously. Repairs made after the framing has already gone through its seasonal shrinkage are far less likely to reopen than repairs made at the peak of summer expansion. Indoor conditions during heating season are also stable and dry, which helps compound cure predictably and paint film form properly. Interior work does not depend on outdoor weather, so scheduling stays reliable through the cooler months. Many homeowners find fall and winter easier to plan around anyway, since the work happens inside and the house stays comfortable throughout.
What to Expect From a Professional Nail Pop and Hairline Crack Repair Visit
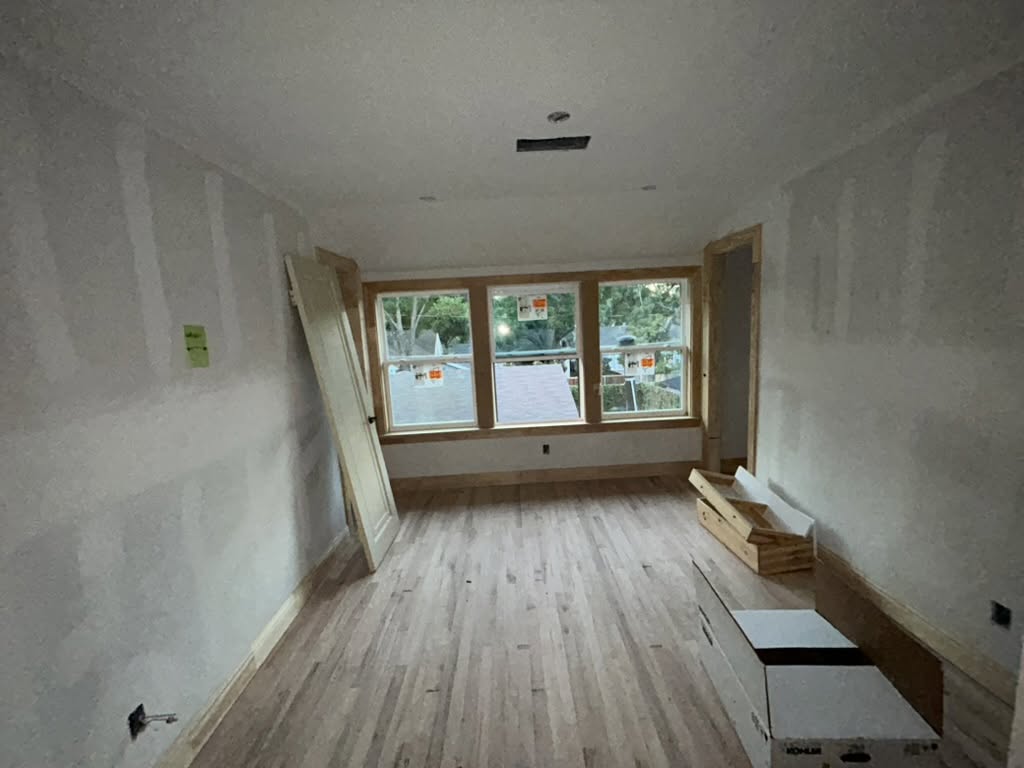
A professional repair visit starts with a walkthrough under raking light so nothing gets missed before the work begins. Every pop, crack, seam, and dent is marked, and the crew notes which areas need refastening versus simple filling. Protection goes down next, covering floors and furniture and sealing off adjacent rooms to control dust migration. Sanding drywall compound produces very fine dust that travels through a house quickly, so containment and vacuum assisted sanding make a large difference in the final cleanup. The scope is confirmed with the homeowner before any compound is mixed. Clear expectations at the start prevent surprises at the end.
The repair itself unfolds over multiple visits in most cases, because compound needs time to dry between coats. A crew might refasten and apply first coats on day one, return for second and third coats, then handle sanding, texture, and priming on a following day. Rushing that sequence is the fastest way to produce shrinkage cracks and visible ridges, so a schedule spread across several days is a sign of competent work rather than slow work. Texture matching is done in daylight when possible so the pattern can be compared honestly against the surrounding surface. Priming follows once everything is sanded smooth and dusted off.
Finish painting completes the process, and this is where the earlier care pays off visibly. Walls are cut in and rolled corner to corner so no patch sits under a spot repair, and ceilings are coated in full to keep the sheen uniform across the span. The crew inspects again under raking light before calling the room finished, since that final check catches anything that moved or shrank during drying. Cleanup returns the space to a usable condition the same day the painting wraps. Live in Allen and dealing with cracked ceilings this season? Click here for our Allen painting services.
Why Choose Venture Painting for Nail Pop and Hairline Crack Repair
Venture Painting handles drywall repair and interior painting as one connected process rather than two separate trades handed off to different crews. That matters because the person patching the wall should understand how the surface will look under the specific sheen going over it, and the person painting should know exactly what was repaired and how recently. Our preparation work is detailed by design, since long lasting results come from what happens before the finish coat far more than from the finish coat itself. We inspect under proper lighting, we refasten rather than simply cover, and we prime every repair before painting. Homeowners across Plano, Richardson, Dallas, and the surrounding communities call us back because the work holds up through the seasons.
Our crews show up clean, organized, and respectful of the home they are working in, which is not a small thing when a project runs several days inside your living space. Floors get covered, work areas get contained, and the site gets cleaned at the end of each day rather than at the end of the project. We communicate the schedule clearly and explain why certain steps need drying time instead of promising a finish date we cannot meet honestly. Estimates are free and the pricing is laid out plainly, with the scope written down so there is no confusion about what is included. That transparency is a large part of how we have built our reputation in this area.
Seasonal drywall damage is normal, it is fixable, and it does not have to come back every winter when the repair is done correctly the first time. If your ceilings have started showing bumps or your door corners have picked up thin cracks since the weather turned, now is a good time to get ahead of it before a holiday gathering or a spring listing. We are happy to walk your home, mark what we find, and give you a straightforward assessment of what actually needs attention. Call Venture Painting at (214) 233-6044 or email zeb@venturepaintingdfw.com to schedule a free estimate. Our team serves Plano and the surrounding communities with detailed prep work, honest pricing, and interior finishes built to last.